This article provides a detailed description of the workflow associated with using Reveal’s AI based features for completing a quick responsiveness check before production
Introduction
This workflow introduces a way to leverage Reveal Supervised Learning for assessing potential Responsive documents left behind following linear review and prior to document production.

Workflow Steps
1. Group Documents
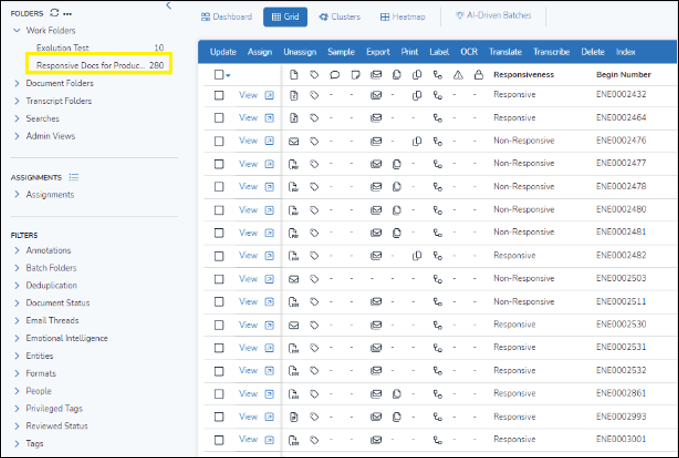
First create a Work Folder in which to place all the documents that have been tagged Responsive (or whichever tag is used to confirm) that are deemed to be ready for Production. Confirm that you have at least four (4) documents tagged as “Responsive” and one (1) tagged “Non-Responsive”.
2. Build Classifier
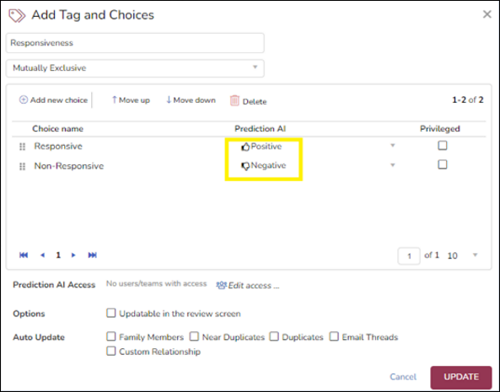
- Edit the Tag used to code the documents to enable Prediction AI, flagging a Positive tag (g., for Responsive) and a Negative tag (e.g., for Non-Responsive).
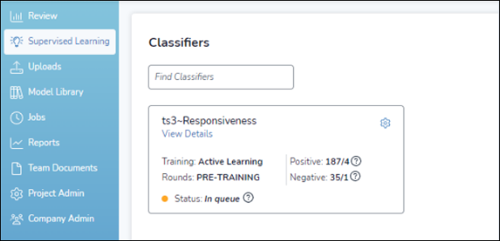
- The system will now create a Classifier for your tag and begin to score documents based on the tags already applied. You can see the Classifier by going to the Supervised Learning tab from the navigation sidebar at the left side of the screen. Note that scores might not be immediately available while the system synchronizes tags and scores to the front-end.
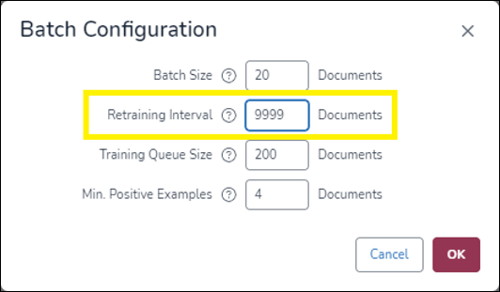
Tip: Given that the primary objective is to validate the responsiveness of untagged documents for production readiness, to avoid frequent model re-training we recommend extending the training interval significantly to minimize unnecessary retraining cycles.
To do this, click on the Gear icon on the Classifier card.
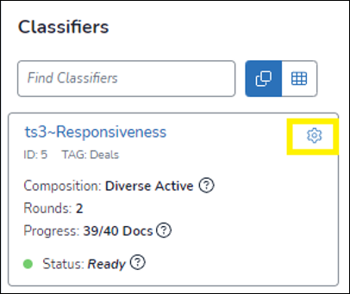
Scroll down to Batch Configuration and click on Choose Settings. Set the Retraining Interval to 9999 (the highest number it will allow).
3. Search and identify
Because the system is now scoring your documents, add the field showing the scores to your Field Profile. The name for the field will start with “Reveal AI Score”.
- Go to Manage Field Profile.
- Find the field showing the scores for your AI tag in the left panel.
- Select it and use the arrow to move it to the right panel.
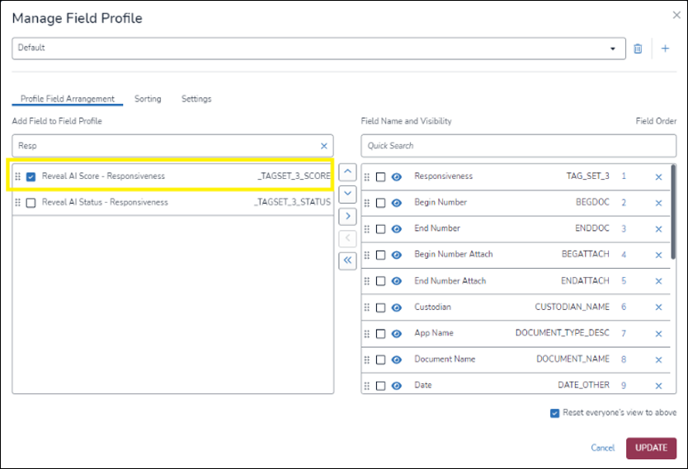
- Once the system finishes scoring the documents, the field will be populated with scores from 0 to 100. The higher the score, the more likely the system believes the document is responsive to the issue being scored.
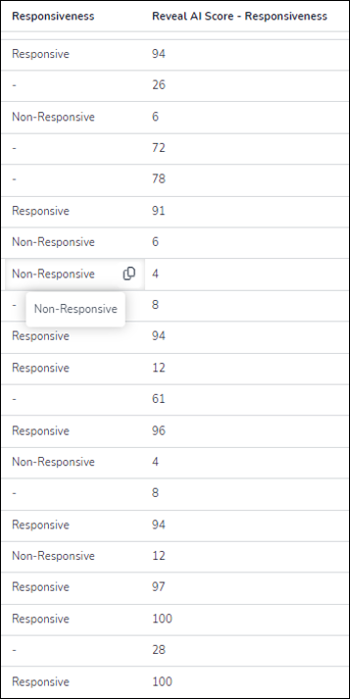
- To locate any high-scoring documents that have not been tagged as Responsive, first filter for high-scoring documents. To do this, click on the funnel icon at the top of the scoring field.

- Then enter a range of scores that you believe are within the high-scoring range and click on Add to Search.

- Open Advanced Search.
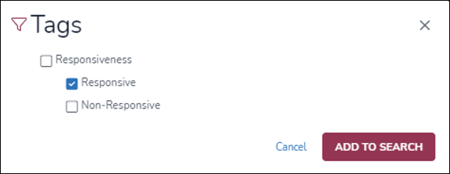
- Go to +Add > Tags and find the tag which you are using to confirm documents have been found for production.
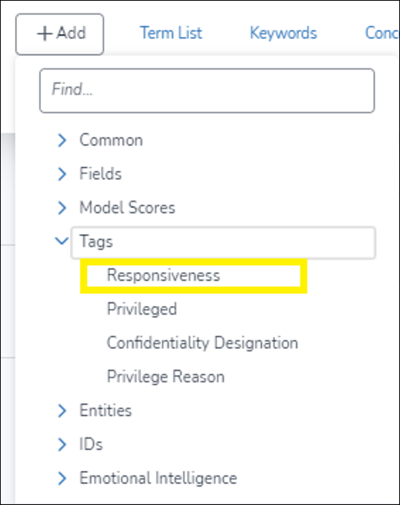
- Then check the appropriate box for the tag and Add to Search.
- In the Search window, change the second “IS” to a “NOT.”
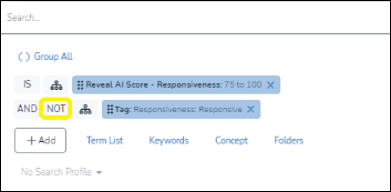
- Run the Search. The resulting documents are documents that received a high score based on the AI Model created from the tagging but have not themselves been tagged Responsive.
4. Review
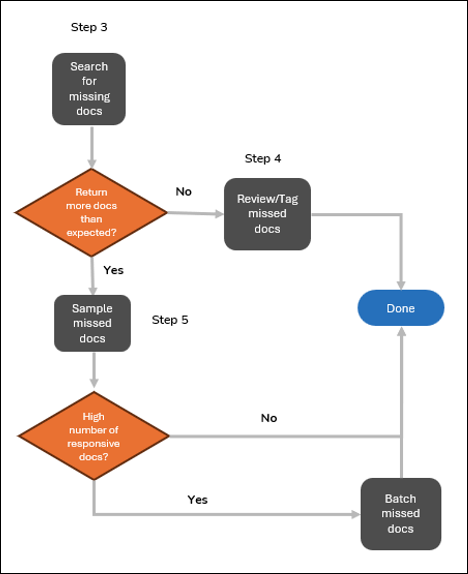
Different options are now available regarding what to do with the search results returned in Step 3 above. The number of documents returned will influence the preferred option of what to do with the results.
- If the search returns very few documents, all of the documents in the search results can be reviewed and tagged manually to confirm or reject the AI inferred responsiveness evaluation.
- If the search returns many documents, it means there might be a significant number of responsive documents left behind. Use the Sampling function to review and determine if it is necessary to batch all documents retrieved in the search for manual review.
- If a sampling review does not reveal a high percentage of responsive documents, no further action is needed.
- If a sampling review reveals a high percentage of responsive documents, batch unreviewed search results to reviewers for further review to conclusion.
The following diagram describes various options available:
Last Update: 8/01/2024
