This article provides both visual and written instructions for creating and assigning redaction options for a project.
Non-Audio Video Tutorial
Client Administrators set up redaction labels and assign them to users and teams for the redaction of project images via profiles in the Redactions Project Admin screen.
- Log in to Reveal as an Administrator or Client Administrator.
- Select a project from the Project Hub.
- Click Admin.
- In Project Manager, go to Redactions.
-
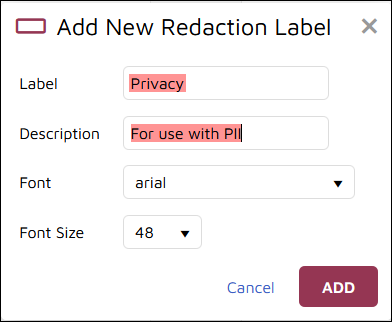
Under Redaction labels pane at screen left, click +Add new label to create a redaction.

-
Label is the text that will be displayed on the redaction.
-
Description is optional.
-
Font defaults to Arial.
-
Font Size defaults to 48 point.
-
Click ADD to create.
-
-
On the right side of the screen, first select or add a new Redaction profile.
- Settings is where you share access with selected user(s) or team(s).
- You may also enter a checkbox to make redactions Updatable for this profile, which allows redaction settings to be modified interactively by profile users and team members.
- You may insert redaction labels into the profile in one of two ways:
- Click or Ctrl-click one or more labels and select Insert in profile; or
- Grab the six-dot handle to the left of a label
 and drag it across to the profile pane.
Among other use cases, Redaction Profiles may be created for specific productions. In this way, preparing a redaction profile that is specific to the current production allows users to select and apply a different set of document redaction labels to documents that may be produced in multiple productions. In the below example, a Production01 Redaction Profile has been prepared, and the new labels PII, PSI and SSI have been added in anticipation of a production addressing privacy and security issues.

Last Updated 6/30/2023
