
Instructions with illustrations on direct loading of data to the Reveal web review application
Upload jobs will create a corresponding import and export job within Discovery Manager. These can be monitored within the Discovery Manager Environment Module.
Non-Audio Video Tutorial
Administrators and their designees can upload data directly into Reveal by selecting Upload from the Navigation panel. This will quickly load relatively small batches of documents without requiring a visit to the Reveal Review Manager or to Reveal Processing. The data uploader can accept virtually any file type, including but not limited to container files such as .zip and .pst files, and forensic images such as EnCase images.
NOTE: Instance Administrators must have a role with appropriate permissions assigned within a project in order to use Upload.
The web Upload utility has been updated in Reveal 2024.7 for Early Access evaluation. While the prior version of web Upload is still available using the +Legacy Upload button, there is no advantage to using it if there is a choice.
Updated Upload
- Click the Uploads button in the Navigation panel.

- This will open the Uploads screen.

- Click +UPLOAD to create and specify a new Upload job. In the Upload modal’s Setup screen, you will specify:
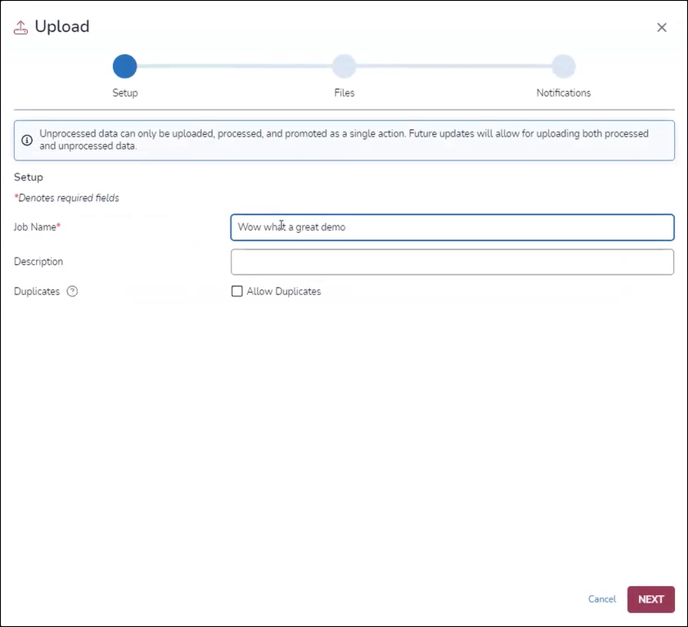
- Job Name – A recognizable name for logging and tracking the upload job; this item is required.
- Description – A place for optional information about the upload.
- Duplicates – Whether or not to Allow Duplicates in the upload.
- Click NEXT to continue to the next Upload section, Files.
- Select Folders to open a file selection pop-up.

A dialog box will open on clicking Select Folder to confirm permission to view files in Reveal.

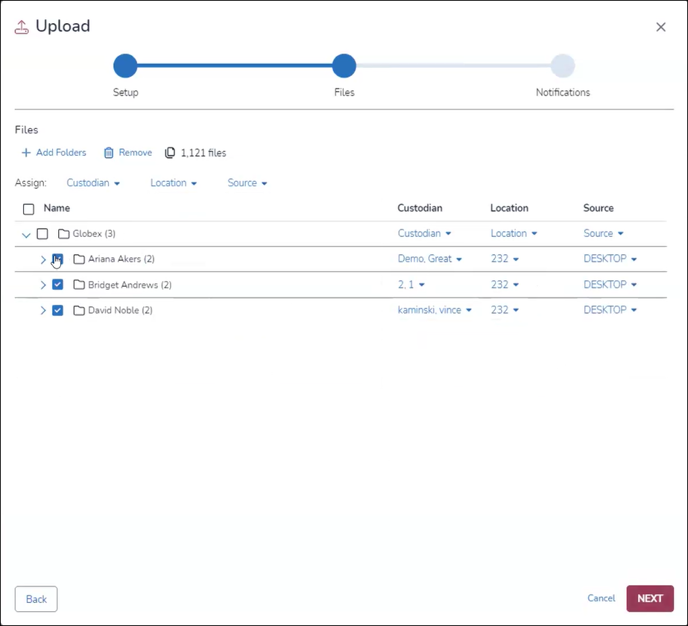
- The folder hierarchy selected will be displayed in the Files screen. You may select a folder to automatically its hierarchy, or choose items at a lower level. A total number of files will be displayed for all selected folders under the Files top-level menu, along with an option to +Add Folders or Remove selected folders or subfolders.

- All items selected must have a Custodian, Location and Source, specified either at the level of each selected folder or at the top Assign level.
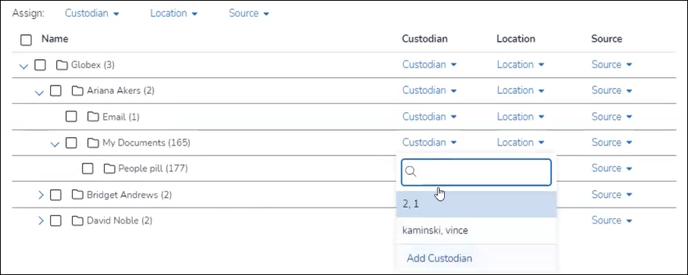
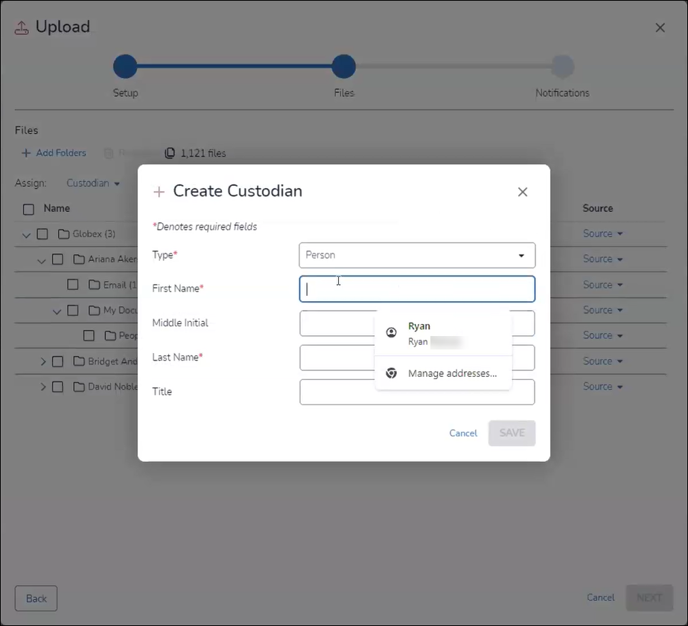
- A Custodian is the entity in whose possession, custody or control a document was collected. If the custodian for file content to be uploaded is not already listed, you may Add Custodian from the field menu.
- Location indicates from where a document was collected (e.g., HQ, Melbourne Branch, MG Home Office or an indicative code).
- Source records the point of origin of the document as collected at the Location.
- When folders or files have been selected and their Custodians, Locations and Sources entered, you may click NEXT to continue.
- All items selected must have a Custodian, Location and Source, specified either at the level of each selected folder or at the top Assign level.
- The Notifications screen is where you specify the Team(s) or User(s) to be notified when the Upload job is complete. The user submitting the Upload job is automatically selected.

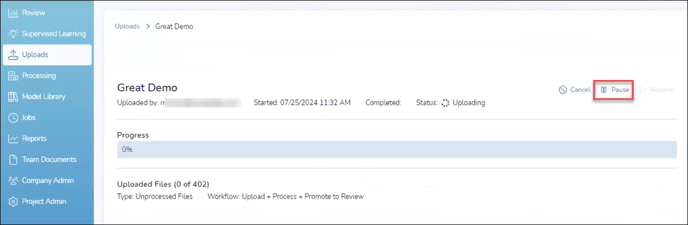
- You may view Upload job status and history in the Job screen (see Upload Jobs below) as before, or simply stay on the main Uploads screen when the job is submitted.

- Clicking on an Upload job name opens a detail screen. This is useful if you wish to Pause (or Cancel) a job, for example, to expedite import and processing of another upload.
Legacy Upload
- In an open project, click Upload in the Navigation panel.

- This will open the Add Data pop-up window, here shown in Dark Mode.
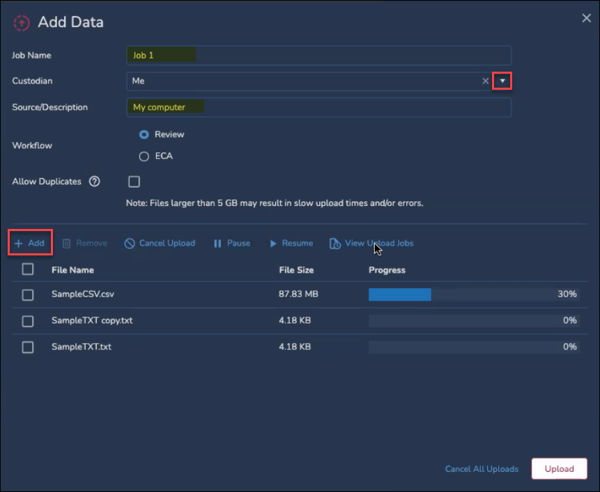
- Enter a Job Name (required).
- Use the dropdown menu to select a Custodian (optional).
-
Enter a Source/Description (optional).
-
Select the desired Workflow - Review or ECA.
-
In the Review workflow, there are default settings for global deduplication, de-NISTing of data and the generation of OCR text. This selection makes standard data available more quickly.
-
For the ECA workflow, the data is uploaded to the processing tool and the data technician can select all of the project settings for the processing of data. This selection is useful for custom filtering and more comprehensive data management.
-
- Select whether to Allow Duplicate Documents to be loaded.
-
Click the +Add button to navigate to the data on disk, or drag and drop the files into the window.
-
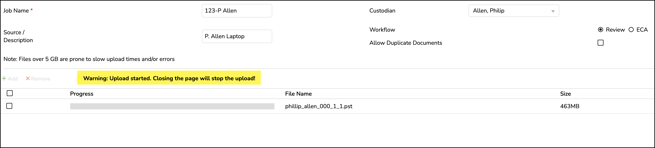
When all of the files have been added, select the Upload button in the bottom right of the popup window.
-
If the Review workflow is selected, the data will be ingested, processed, and automatically indexed while being pushed into Review.
-
Click Upload to start processing.
- A pop-up will indicate when the Upload is complete and offer the options to Close or Upload More.

Upload Jobs
-
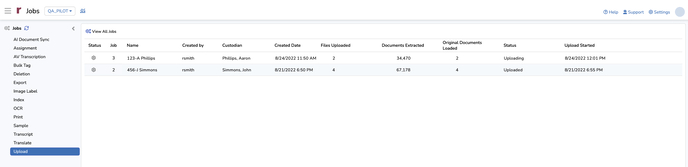
To check the status of an upload job, you may also open Jobs in the Navigation panel.
-
In the Jobs screen, select Upload.
-
All Upload jobs will be summarized on the table, the most recent on top. A gear icon under Status indicates that the job is still processing; a green checkmark indicates that it is complete; a red X indicates that there has been an error.
-
Click the drop-down arrow under the Status column for the latest upload to see the available reports.
-
Archive Exception Detail reports on issues with uploaded containers such as ZIP, PST, or forensic images.
- File Exception Detail reports on import issues with individual files within the upload dataset.
-
Upload Summary Report is the most comprehensive, and indicates the Bates range assigned to the uploaded documents.
-
-
When an upload job is complete a box will pop up over the Add Data window asking if there are any further data to be loaded or if all upload is complete.
Upload jobs will create a corresponding import and export job within Discovery Manager. These can be monitored within the Discovery Manager Environment Module.
Last Updated 10/17/2024