
This comprehensive guide walks you through downloading all the documents in your project along with all available metadata.
Introduction
Logikcull projects can be fully exported by downloading all the documents in your project along with all available metadata. This guide provides step-by-step instructions on how to achieve this, whether you require all records, including duplicates, or only unique instances of each record. Before proceeding, please note that Logikcull offers Archiving - "cold storage" instant archiving that retains all uploads, downloads, imaging, metadata processing, indexing, deduplication, work product, and downloads.
Exporting All Records Including Duplicates (Scenario A)
- From My Projects, select the project that needs to be exported.
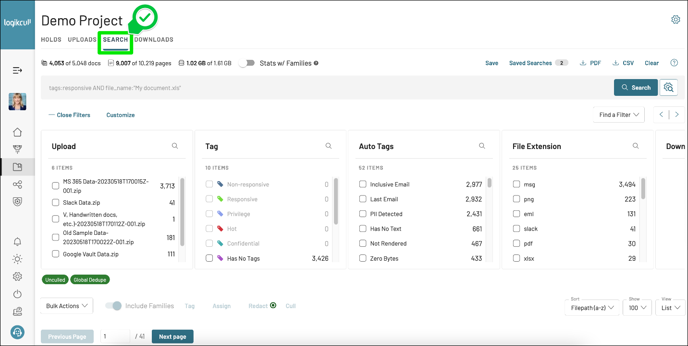
- Click on Search.
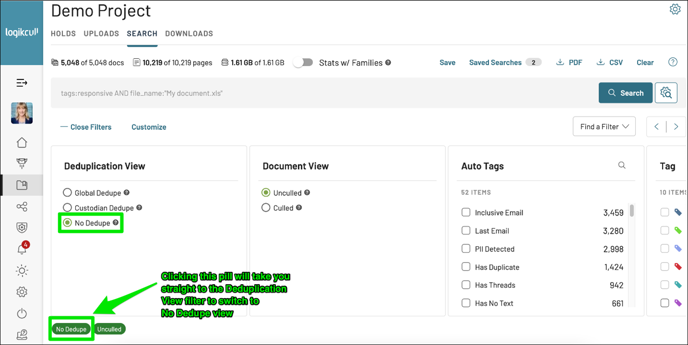
- Switch to the "No Dedupe" Deduplication View. You can quickly navigate there by first selecting the "pill" located below the filter carousel.
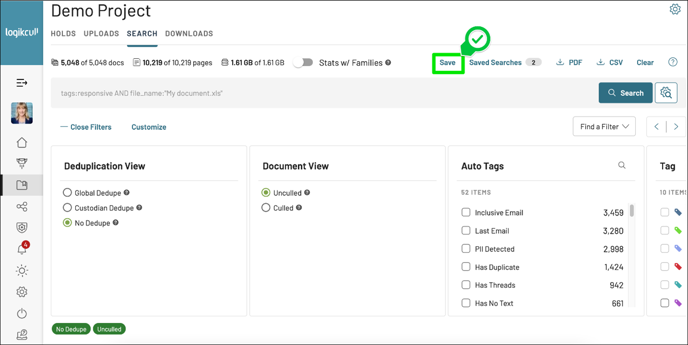
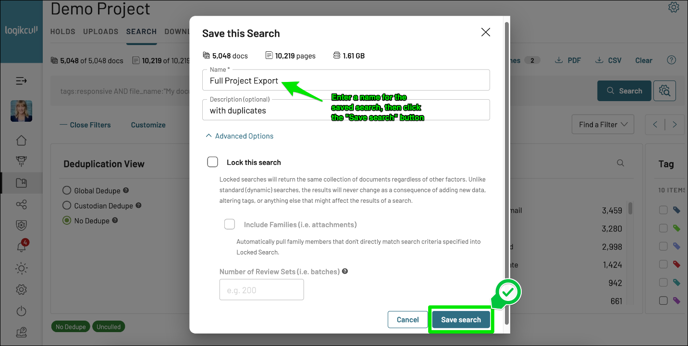
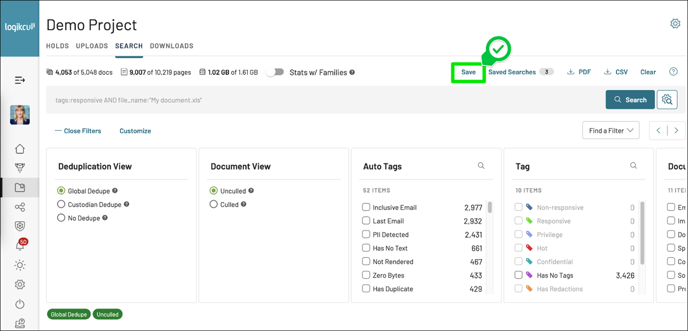
- Save the search.
Process to Export All Records
Step 1: From "My Projects", select the project that needs to be exported.

Step 2: Click on Search at the top of the page.
Step 3: Switch to the "No Dedupe" Deduplication View. You can quickly navigate to this filter by clicking the deduplication "pill" located beneath the filter carousel.
Step 4: Save the search in No Dedupe view.
Exporting Only Unique Instances of Records (Scenario B)
- From My Projects, select the project that needs to be exported.
- Click on Search.
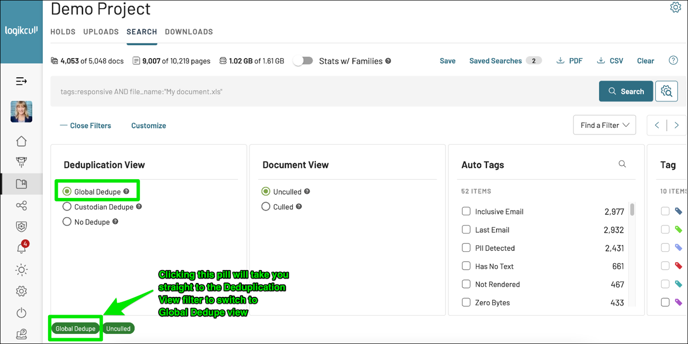
- Toggle to the "Global Dedupe" Deduplication View. You can quickly navigate there by first selecting the "pill" located below the filter carousel.
- Save the search.
⚠️ Make sure to check for any culled documents to see if any documents need to be unculled and included in the export.
Process to Export only Unique Instances of Records
Step 1: From "My Projects", select the project that needs to be exported.
Step 2: Click on Search.
Step 3: Toggle to the "Global Dedupe" Deduplication View. You can quickly navigate there by first selecting the "pill" located below the filter carousel.
Step 4: Save the search in Global Dedupe view.
Preparing Your Download
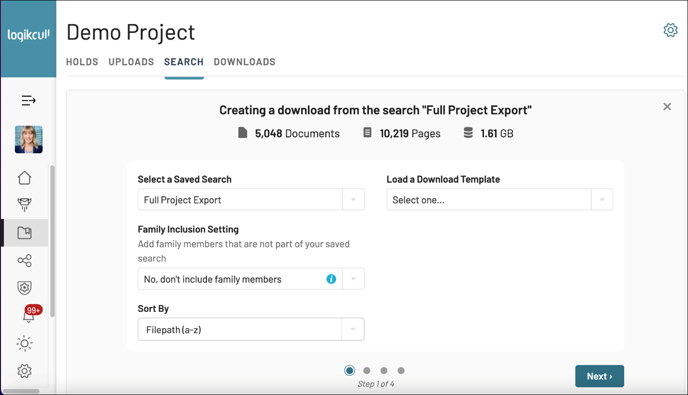
After saving your search, you can prepare your download.
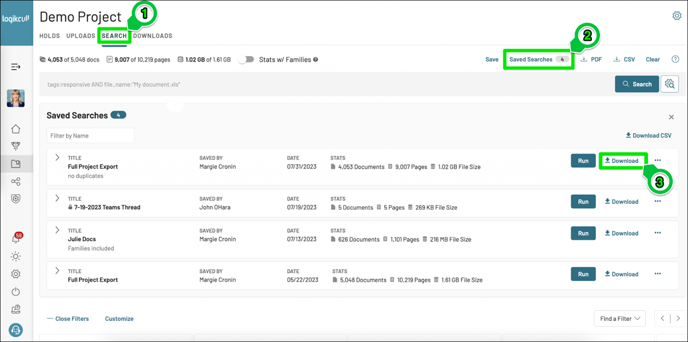
- Navigate to the Search tab.
- Click on Saved Searches.
- Click on Download for the saved search you created.
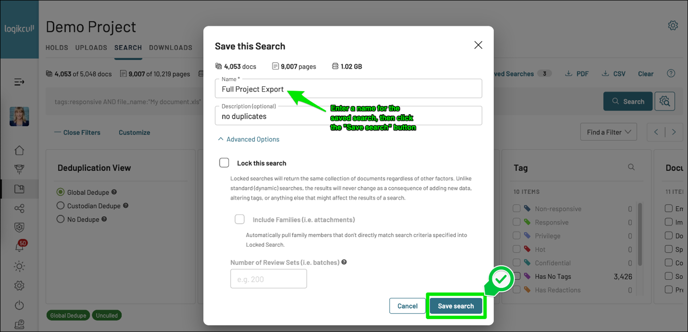
- Set the parameters as required and click Next.
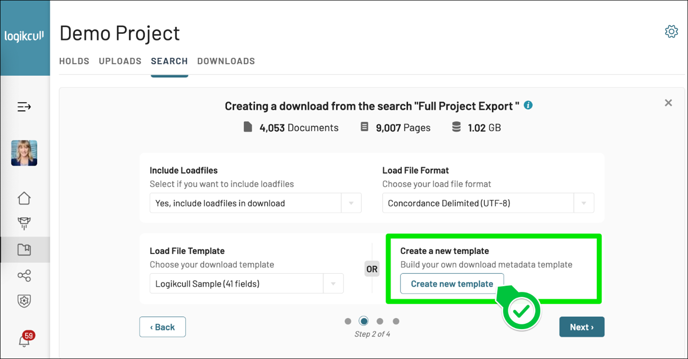
- We recommend creating a new template that utilizes all available fields except for "Full Text", "Duplicate IDs", and "Duplicate Files."
- Choose the load file format according to your needs, though DAT format (e.g., Concordance UTF-8) is highly recommended.
- Decide whether to include IMAGES, NATIVES, and/or TEXT FILES and click Next.
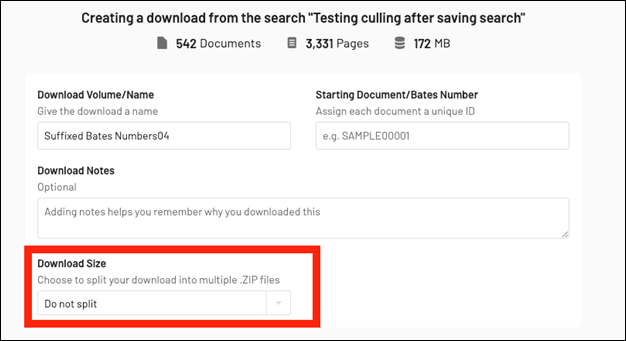
- Assign "Download Volume/Name" and "Starting Document/Bates Number". If your download exceeds 4GB, you can split the download into smaller parts by selecting a "Download Size" option. Otherwise, select "Do Not Split".
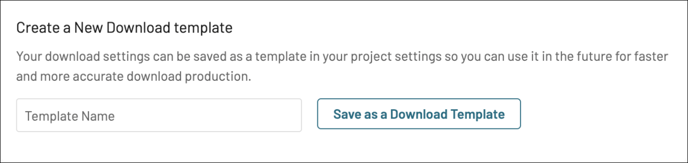
💡 You may elect to save your specifications as a "Download Template", which can be shared across projects for other project exports.
Step 1: Set the parameters as required and click Next. Feel free to change the Sort By order in this step to suit your preferences.
Step 2:
- We recommend creating a new template that utilizes all available fields except for "Full Text", "Duplicate IDs", and "Duplicate Files."
- Choose the load file format according to your needs, though DAT format (e.g., Concordance UTF-8) is highly recommended.
- ENSURE THAT YOU DO NOT HAVE THESE FIELDS IN YOUR LOAD FILE:
- "FULL TEXT"
- "DUPLICATE IDs"
- "DUPLICATE FILES
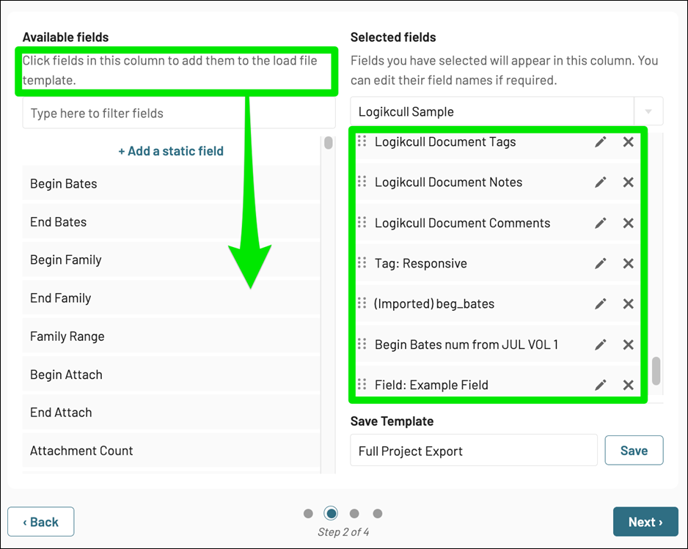
⚠️ ** ENSURE THAT YOU DO NOT HAVE THESE FIELDS IN YOUR LOAD FILE: ** ⚠️
- "FULL TEXT"
- "DUPLICATE IDs"
- "DUPLICATE FILES
Step 3: Elect to include IMAGES, NATIVES, and/or TEXT files, and click Next:
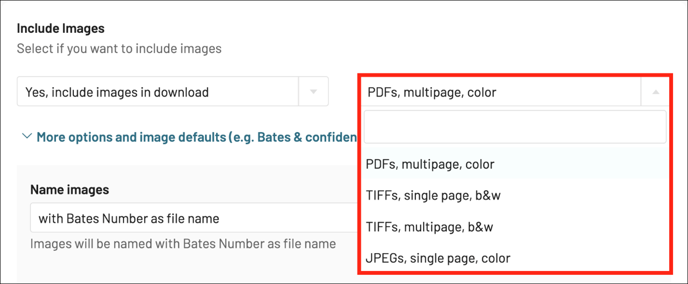
IMAGES
Redactions: No, don't include
Name: “with Bates Number as file name” [REQUIRED]
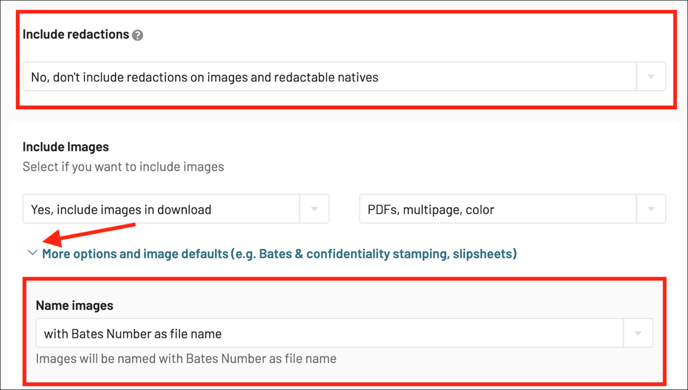
⚠️ NOTE: For the image format, if supplying to another party, we suggest you confirm with the requesting party the format of the images:
a) PDF multipage (color),
b) TIFF single page (back and white)
c) TIFF multipage (black and white)
Endorsements: Yes/No
Slipsheets: Yes/No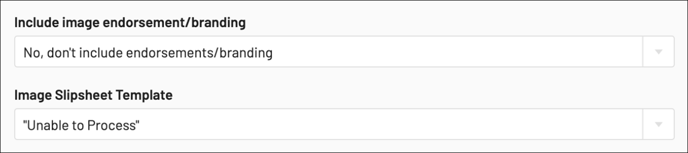
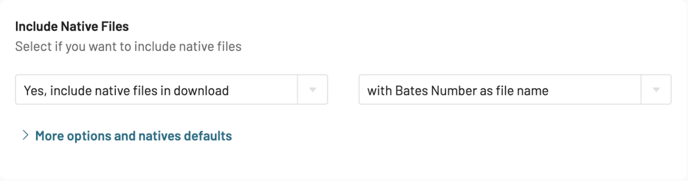
NATIVES
Name: “with Bates Number as file name”
TEXT FILES
Yes, include text files.

Step 4: In the final step, assign the following:
"Download Volume/Name"
"Starting Document/Bates Number"
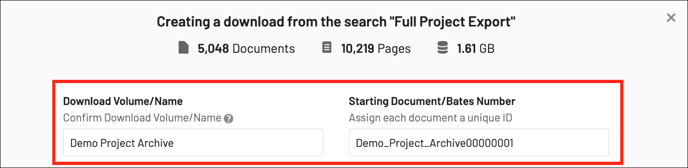
⚠️ Note: When setting the starting document/Bates number, we recommend the following notation that includes the name of the project and the starting "document/Bates" number (i.e. Project Name: SALT_V_PEPPER):
- i) SALT_V_PEPPER_ARCHIVE00000001
- ii) SALT_V_PEPPER_PROD000000001
If your download/export exceeds 4 GB, you can also elect to split the download into smaller chunks, by selecting a "Download Size" option. Otherwise, select "Do Not Split".
⚠️ NOTE: If you'd like, you can also elect to save your specifications as a "Download Template", which can be additionally shared across projects for other project exports.
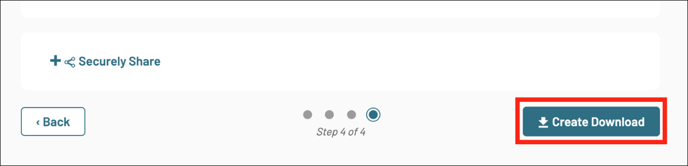
Click Create Download.
Final Notes
After running the full project download, we additionally recommend preserving copies of any previous downloads/exports, just for safe measure.
For productions with over 1 million documents, we typically recommend breaking the produced load file into two parts:
- A load file produced through the download process that includes all of your needed metadata fields; and
- A CSV report that includes work product:
- Logikcull Document Notes
- Logikcull Document Comments
- Logikcull Document Tags
- Individual Tags
- "Doc Num From" (Full Project Volume Name)
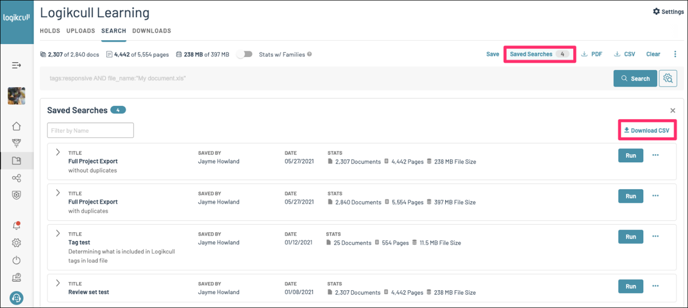
We also recommend downloading a CSV of your saved searches, in the project you're exporting from, in case they need to be re-created. A screenshot walkthrough of how to do so can be found below:
To export redacted versions of documents:
- Filter the document list for the tag "Has Redactions".
- Save a search for the filtered list of redacted documents.
- Create a Download from the saved search. In the load file, include Begin Doc and "Doc num from [previous archive export name]." This will allow you to cross-reference the redacted documents with the non-redacted version in the original export.
- Select "Yes, include images in download," "with doc number as file name" and "Yes, include redactions on images" to export the redacted version of the document.
- Select "No" for natives and text files.
Last Updated 6/07/2024