
This comprehensive guide walks you through downloading all the documents in your project along with all available metadata.
Exporting your data
The migration process begins by exporting your data from Review. The goal of this process is to prepare your archive for easy upload into Logikcull and preserve any existing work product. Work product such as tags, notes, comments, etc., from existing databases can be mapped to new fields in Logikcull. However, redaction coordinates made from existing database cannot be migrated.
Produced records with Bates stamped images will need to be uploaded separately, as these cannot be associated with the original version of the document.
Review Export Workflow
-
Work Folders - Identify the records to migrate and create a Work Folder containing those records.
- This process is outlined in Reveal knowledge base documentation online below.
https://education.revealdata.com/knowledgebase/reveal/how-to-create-a-production-set - Work Folders
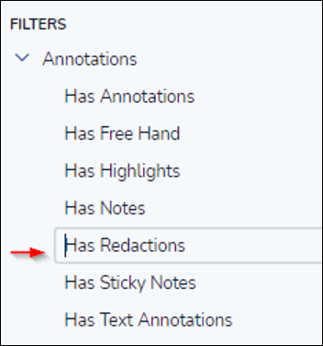
- Populate a Work Folder with all records with redactions.
- Navigate to Filters->Annotations->Has Redactions in the Sidebar.
- Navigate to Filters->Annotations->Has Redactions in the Sidebar.
- Populate a Work Folder with all records to be migrated.
- Populate Work Folders with all records that have images in image sets.
- Create a multi value field called “Image_Set_List” under Project Admin -> Fields -> Add Fields.
 2. Run the below script to populate “Image_Set_List” field. If a record has an image in an image set, this will be populated with the name of the image set.
- Populate a Work Folder with all records with redactions.
- This process is outlined in Reveal knowledge base documentation online below.
CREATE TABLE IMAGE_SET_TEMP (ITEM_ID BIGINT,
IMAGE_SETS NVARCHAR(4000))
insert into IMAGE_SET_TEMP
select DIS.ITEM_ID, ISI.Name
FROM DOCUMENT_IMAGE_SETS ISI, DOCUMENT_IMAGES DIS
WHERE ISI.Document_Image_Set_Id = DIS.Document_Image_Set_Id
and DIS.Page_Id = 1
insert into IMAGE_SET_TEMP
select DIS.ITEM_ID, 'Original Image Set'
FROM IMAGE_ANNOTATION DIS
WHERE DIS.Page_Id = 1 and dis.image_exists = 1
select distinct item_id
into IMAGE_SET_TEMP3
from IMAGE_SET_TEMP
CREATE TABLE IMAGE_SET_TEMP2 (ITEM_ID BIGINT,
IMAGES_SET_LIST NVARCHAR(MAX))
insert into IMAGE_SET_TEMP2
select distinct DIS.ITEM_ID,
STUFF((SELECT ';' + ISI.IMAGE_SETS FROM IMAGE_SET_TEMP ISI
WHERE ISI.ITEM_ID = DIS.ITEM_Id
order by ISI.IMAGE_SETS
FOR XML PATH (''))
, 1, 1, '') AS IMAGES_SET_LIST
FROM IMAGE_SET_TEMP3 DIS
--create multi value custom field, in update assumes field name is IMAGE_SET_LIST, length can be 4000 assuming no long image set names
update ID SET ID.IMAGE_SET_LIST = IST.IMAGES_SET_LIST FROM IMPORT_DOCUMENTS ID JOIN IMAGE_SET_TEMP2 IST ON ID.ITEMID = IST.ITEM_ID
DROP TABLE IMAGE_SET_TEMP
DROP TABLE IMAGE_SET_TEMP2
DROP TABLE IMAGE_SET_TEMP3
3. Run the Query against the chosen Project in the Review Manager Advanced Options -> Query tab.
 4. Rebuild multi-values for the chosen Project in the Review Manager Advanced Options -> Refresh Document Records tab.

iv. Reindex document metadata for all Imports in Review Manager Create -> Indexes.
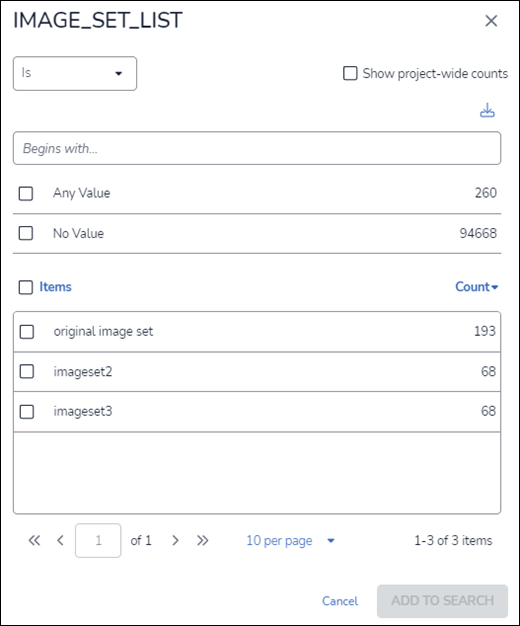
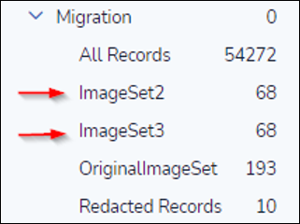
v. Filter for each image set and populate a Work Folder with the Image Set Name.
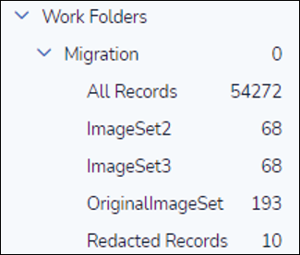
vi. You’ll now have Work Folders populated for “All Records”, “Redacted Records” and one for each image set.
2. Production Jobs - Create production jobs built upon the above Work Folder.
a. This process is outlined in Reveal knowledge base documentation online below.
https://education.revealdata.com/knowledgebase/reveal/how-to-create-a-production-job
b. Migration Productions
i. Create a Native Only Production Job, with all records to be migrated.
Documents – Select the “All Records” Work Folder as the source.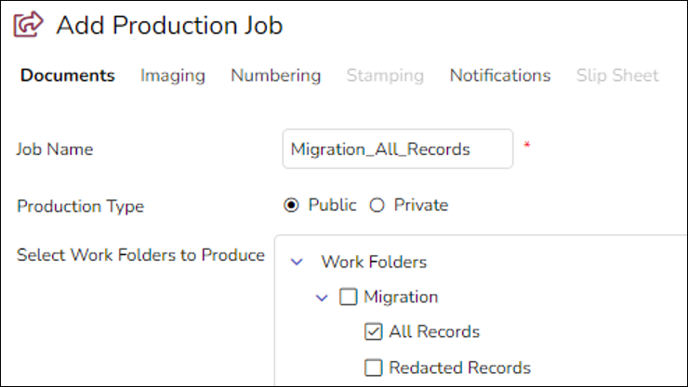
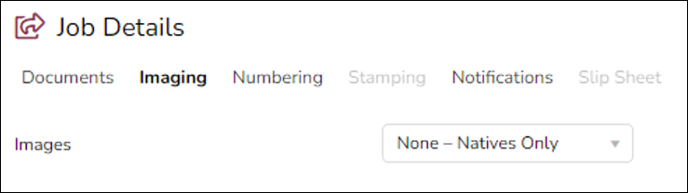
Imaging - Select None – Natives Only.
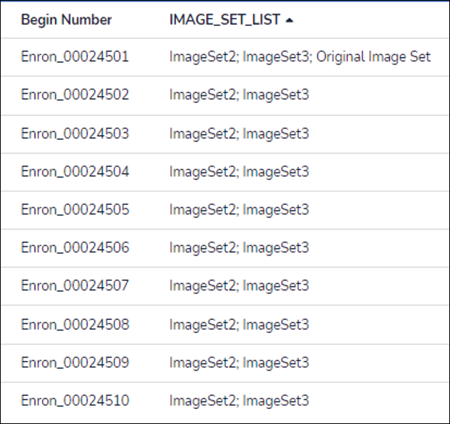
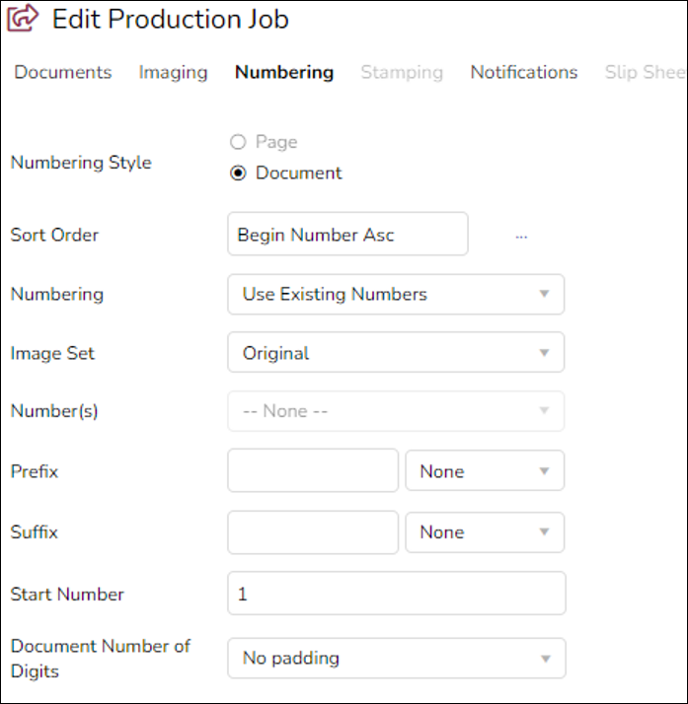
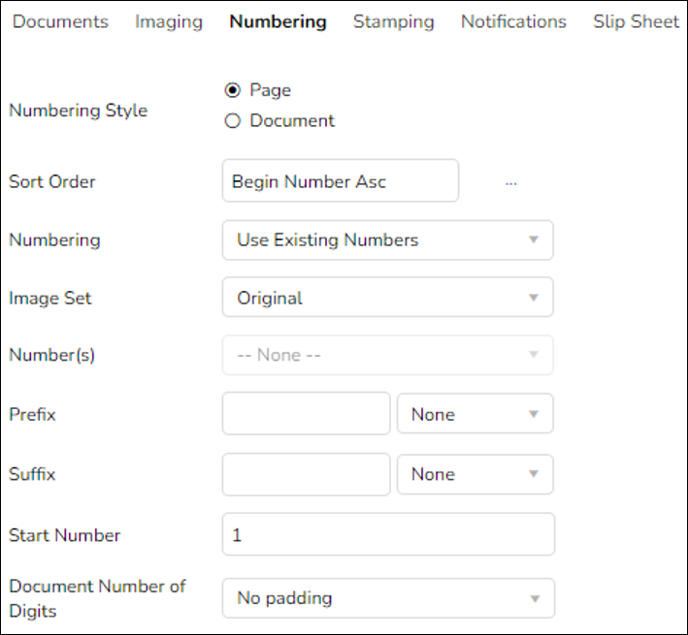
Numbering - Select Use Existing Numbers and the Original Image Set. This will number the records with their Begin Number.
Select Save As New.
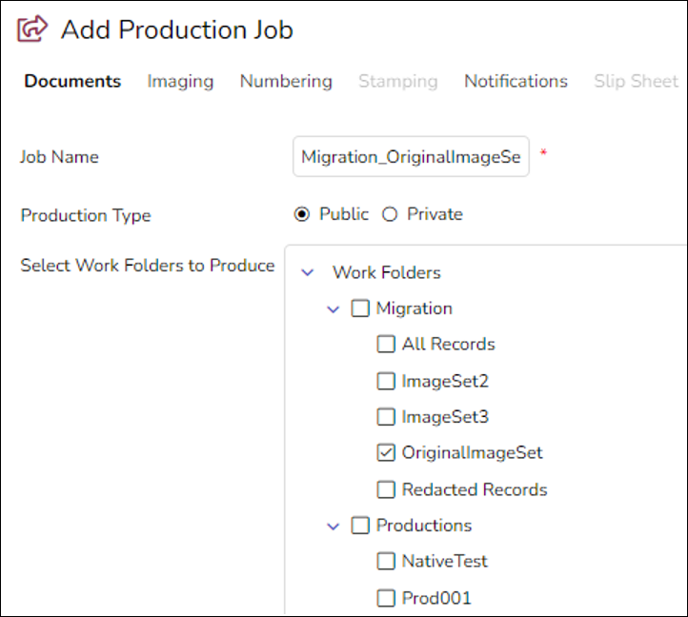
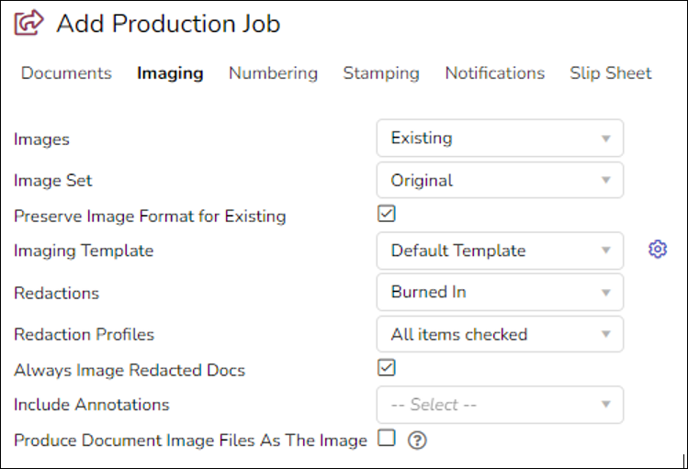
ii. Create an image Production comprised of the records with images in the Original Image set.
Documents – Select the “OriginalImageSet” Work Folder as the source.
Imaging - Select Existing and the Original Image Set. Remove the check next to Always Image Redacted Docs. We will export these in the next production.
Numbering - Select Use Existing Numbers and the Original Image Set. This will number the records with their Begin Number.
Stamping - No stamping will be needed.
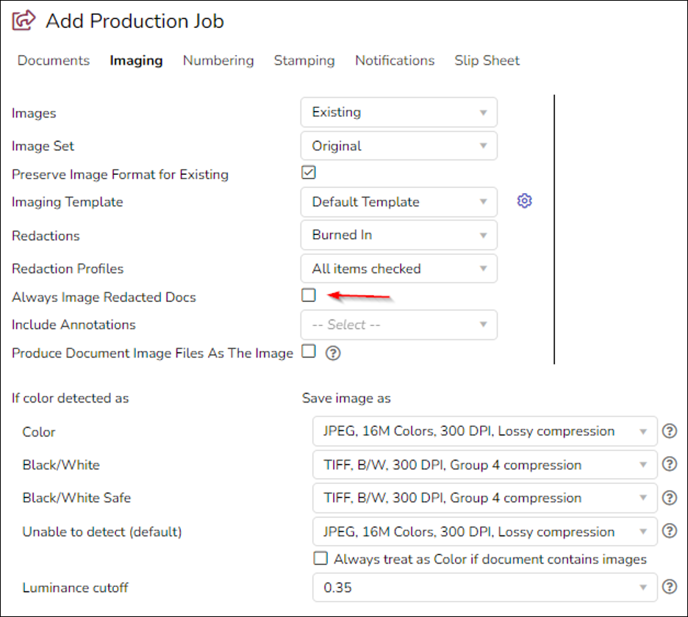
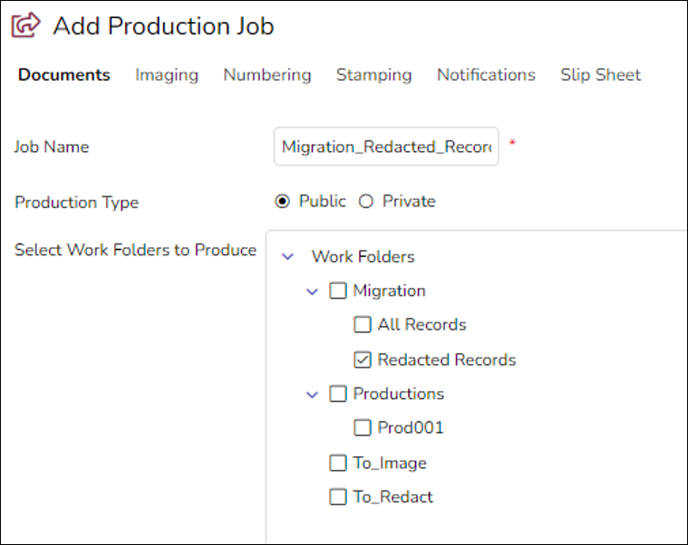
iii. Create an image Production comprised of the records with redactions.
Documents – Select the Redacted Records Work Folder as the source.
Imaging - Select Existing and the Image Set that has the redactions. Typically, this will be the Original Image Set.
Numbering - Select Use Existing Numbers and the Original Image Set. This will number the records with their Begin Number.

Stamping - No stamping will be needed.
b. Productions – Previously produced records will get exported; these production jobs will already exist.
1. Skip to step 5)b)iii) below.
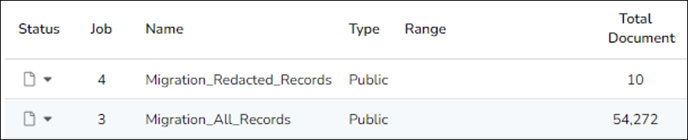
2. You should now have two productions built as well as any prior productions. The below example shows one previous production “Prod001”.
 3. Preprocessing
a. This process is outlined in Reveal knowledge base documentation online below:
https://www.revealdata.com/knowledgebase/reveal/how-to-run-production-job-preprocessing
b. Migration Productions
i) Native Only Production - All records to be migrated.
ii) Image Production - Records with redactions.
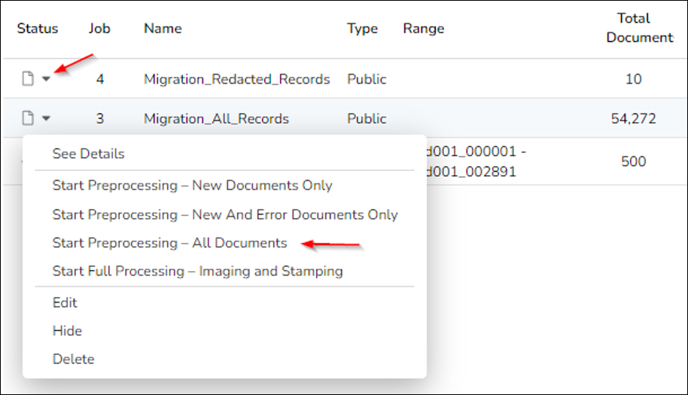
Click the drop down and select Start Preprocessing – All Documents for both the native and redaction production.
4. Create an image Production for any other image set that has images.
5. Run Productions
a. This process is outlined in Reveal knowledge base documentation online below:
https://www.revealdata.com/knowledgebase/reveal/how-to-run-a-production-job
b. Migration Productions
i. Native Only Production - All records to be migrated.
ii. Image Productions
(1) Original Image Set.
(2) Records with redactions.
(3) All other image sets.
Click the drop down and select Start Full Processing – Imaging and Stamping for all productions.

6. Export Productions
a. This process is outlined in Reveal knowledge base documentation online below: https://education.revealdata.com/knowledgebase/reveal/how-to-run-production-job-export
b. Migration Productions
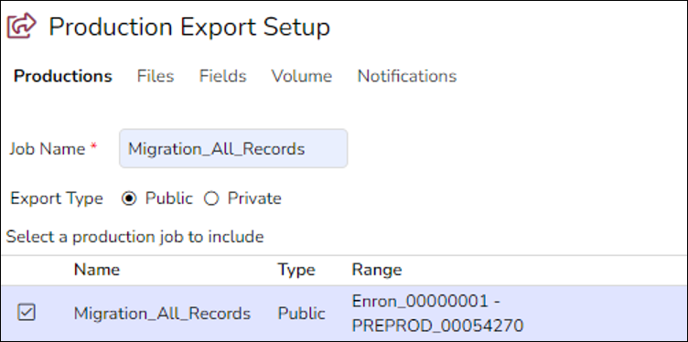
i. Native Only Production - All records to be migrated.
Productions – Select the “Migration_All_Records” production.
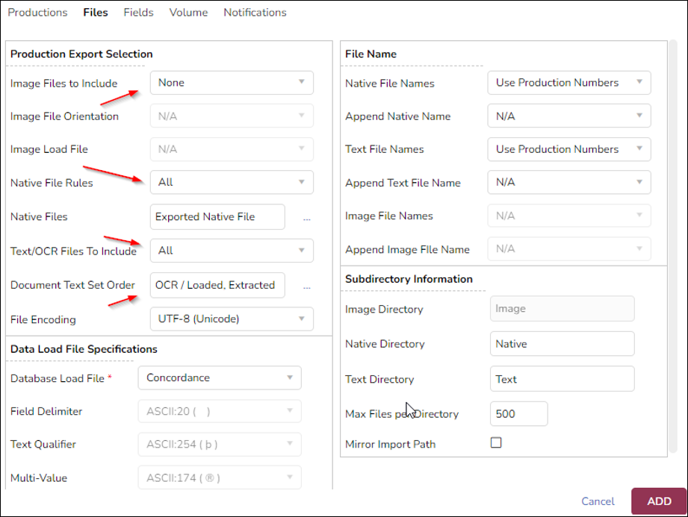
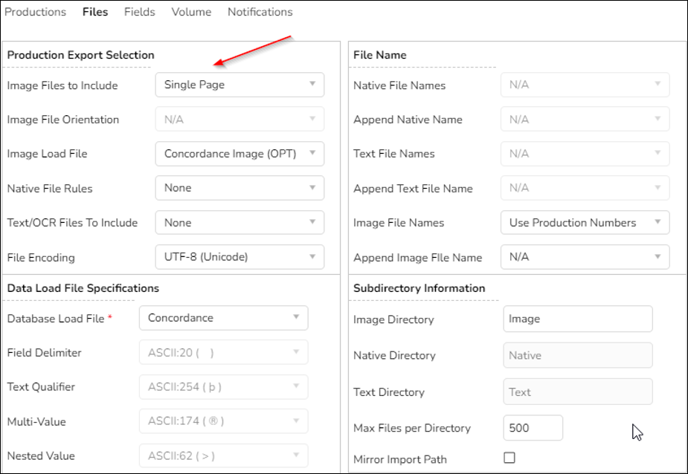
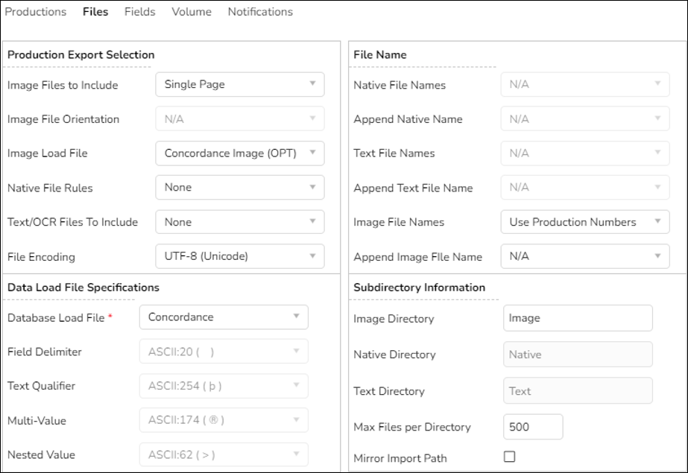
Files – Use the below settings.
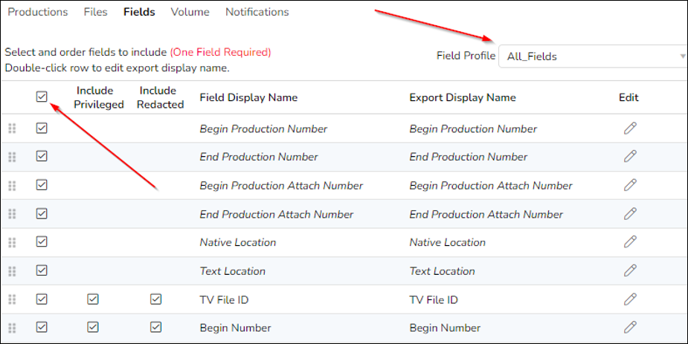
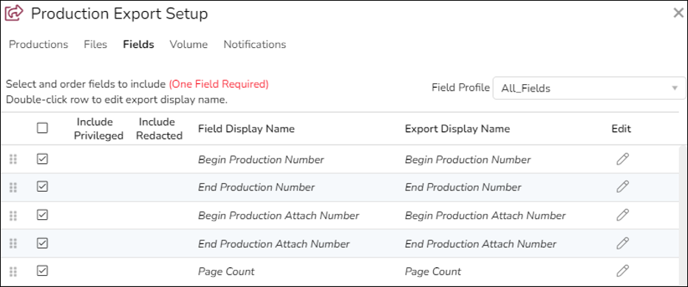
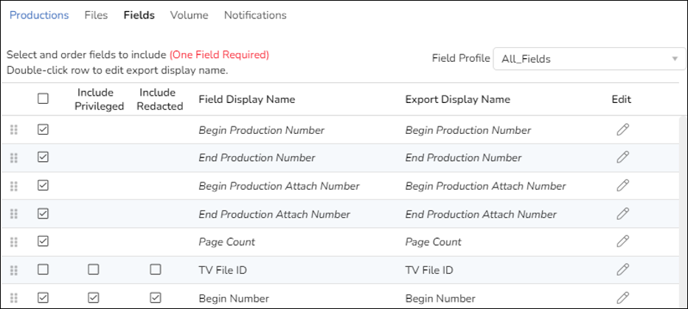
Fields – We recommend you export ALL available fields for preservation.
Create a Field Profile with all fields in it, then select this field profile and check all fields.
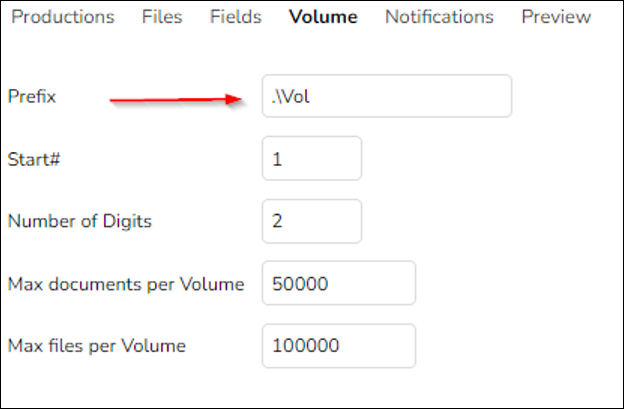
As mentioned in the migration export requirements above, the paths in the load files need to have a relative path starting with “.\”. To achieve this we need to add the “.\”to the Prefix as shown below.
Click add at the bottom right of the screen to complete the export settings.
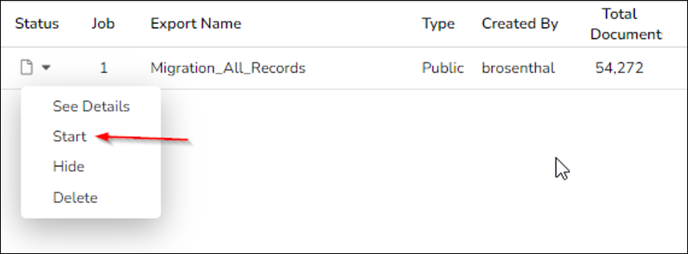
Start the production export.
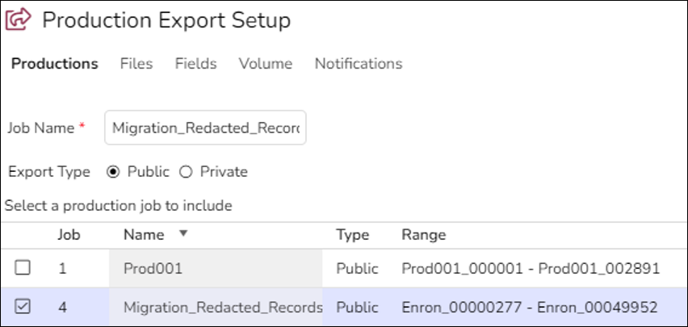
ii. Image Productions – Below is an example for the Records with redactions. You will run through this process for all the image productions.
Productions – Select the “Migration_Redacted_Records” production.
Files – Use the below settings.
Fields – Metadata was already exported in the native export, so you should just export the default fields.
Select Add on the bottom right and run the production.
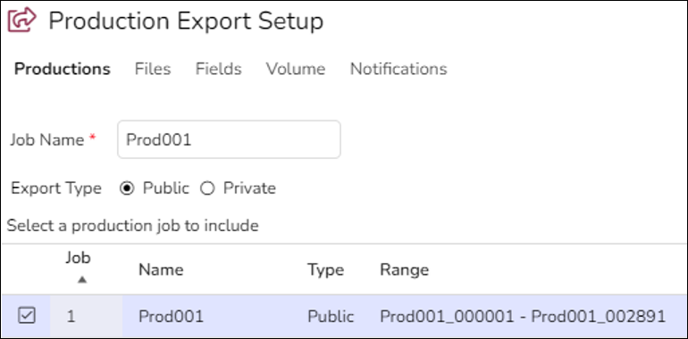
iii. Previous Productions – For every previously produced production go through the steps below.
Select the previous production “Prod001”.
Use the below settings.
Select the fields you would like. The minimum is shown below.
NOTE: Begin Number is important as this will be the cross reference between the produced and original records.
Select Add on the bottom right and run the production.
7. Download each export
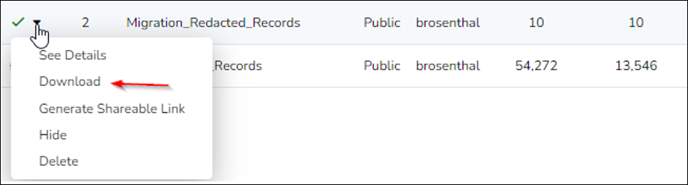
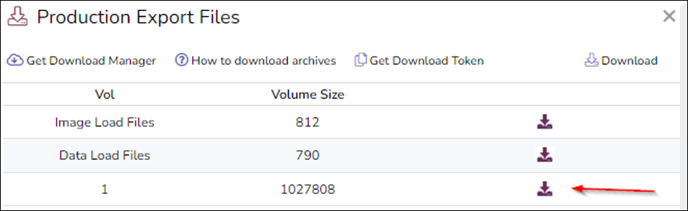
You will now have zips for each of the downloads above. Extract the combined load files from their zip containers.
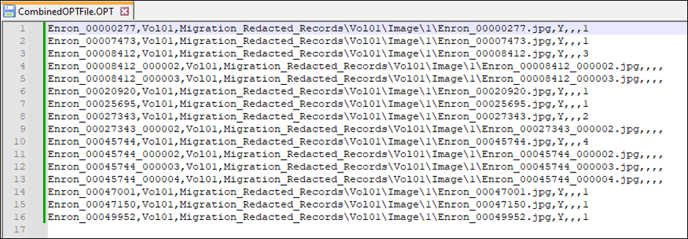
The paths in the load files will start with “\Vol” but the folder paths in the zips to the Natives, Text and Images will start with the name of the production. Example below:
Migration_Redacted_Records\Vol01\
The folder paths in the load files to the Natives, Text and Images must be updated to start with the production name. Example Below:
Last Updated 6/03/2024